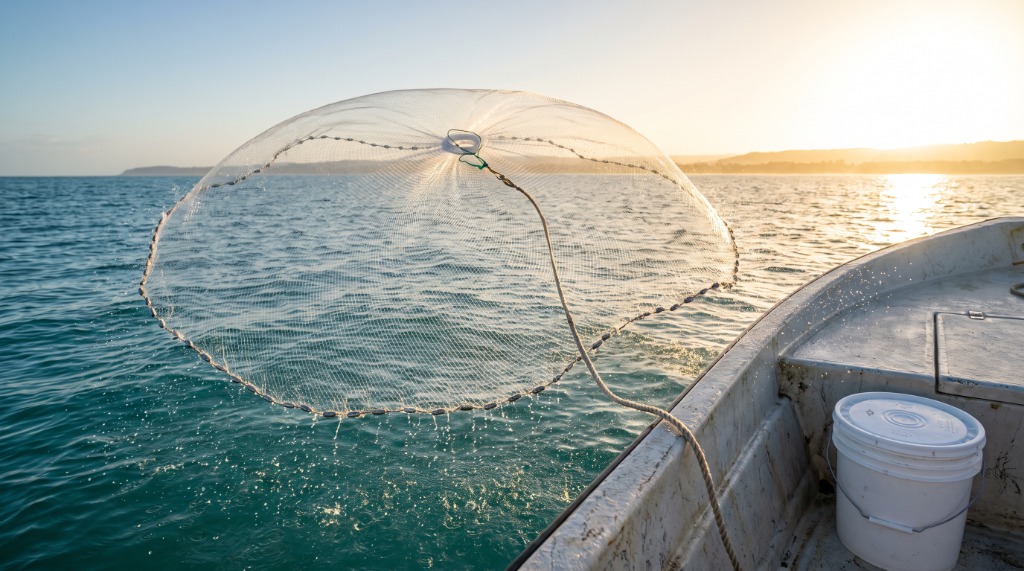
The Quick Catch
A cast net thrown with proper mechanics and matched to the right mesh size will put more live bait in your livewell in 20 minutes than a bait shop can sell you in a week — and that bait will be fresher, livelier, and far more likely to get eaten. This guide covers the complete throwing mechanics for both small and large nets, a full mesh-size matrix for shad, mullet, menhaden, shrimp, and pilchards, sink rate physics, and the maintenance habits that make a $120 net last a decade. Whether you're loading up on threadfin shad for a striper run or scooping pogies before an offshore cobia trip, these are the mechanics that matter.
Tactical Overview
- 1. Physics & Anatomy — Why This Works
- 2. Complete Mesh Size & Sizing Matrix
- 3. Equipment Setup — Brands & Materials
- 4. Step-by-Step Throwing Technique
- 5. Care, Storage & Maintenance
- 6. Pros & Cons Assessment
- 7. Who Needs This Guide (and Who Can Skip)
- 8. Frequently Asked Questions
- 9. Pro Tips & Key Takeaways
1. The Physics & Anatomy of a Cast Net — Why This Works
A cast net is not a throwing tool. It is a closing trap — and the entire mechanical design exists to accomplish one thing: get a weighted circle of mesh to land flat on the water surface simultaneously, then collapse inward before the bait can escape downward or sideways. Every component of the net is engineered around that single outcome. Once you understand the anatomy, the throwing mechanics stop feeling like an awkward circus act and start making physical sense.
Radius vs. Diameter — The Number That Actually Matters
Every cast net is sold by radius, not diameter. A 6-foot cast net has a 6-foot radius from the horn (the center top ring) to the leadline (the weighted bottom perimeter). When thrown correctly and opened to a full circle, that net covers a 12-foot diameter on the water surface — 113 square feet of coverage. This distinction matters because most anglers shopping for their first net assume a "6-foot net" covers 6 feet of water. It covers 12. A 10-foot net covers 20 feet — and throws like a wet blanket if you don't have the shoulder rotation to match.
The Horn
The horn is the rigid top ring — typically molded nylon or hard plastic — through which all braille lines converge. Your handline attaches here. This is the structural anchor of the entire net.
Braille Lines
These are the 20–30 internal retrieval cords running from the horn down through the mesh to the leadline. They are typically constructed from 80–100 lb monofilament. When you yank the handline upward after the net settles on the bottom, the braille lines draw the leadline up toward the horn like a drawstring bag closing — trapping everything inside. The pocket depth and braille line count determine how fast and completely the net closes. Cheap nets use fewer, stiffer braille lines that close unevenly, letting bait escape at the gaps.
The Leadline & Sink Rate — The Variable Most Anglers Ignore
The leadline is the weighted perimeter of the net, and its weight-per-foot determines how fast the net sinks. The industry standard is 1 lb of lead per foot of net radius. A 6-foot net should carry approximately 6 lbs of lead on the perimeter. A 10-foot net should carry 10 lbs.
For deep-water applications — targeting menhaden holding at 12–18 feet, or shad suspending over a 20-foot flat — you want 1.5 lbs per foot of radius. The heavier perimeter maintains the net's open circle shape as it sinks through the water column instead of collapsing inward from current or the bait's own escape pressure.
Here is why this matters more than net size: a fast bait species like mullet or menhaden (pogies) can dive 4–6 feet straight down in under 2 seconds after the net hits the surface. If your net is sinking at 1 foot per second instead of 2 feet per second, those fish are already below the closing leadline before the net reaches them. You'll pull up an empty net every single time and never understand why.
⚡ War Story: The Destin Pass Lesson
Off Destin Pass on a September morning, I watched a client throw a beautiful, technically perfect circle with a budget 8-foot net rated at 0.75 lbs per foot. The pogies were stacked at 6 feet. The net hit the surface in a perfect pancake — and those fish just swam under the leadline while it floated down like a parachute. We switched to my personal 8-foot Calusa rated at 1.5 lbs per foot, same exact throw, and pulled up 40 pogies on the first drop. The physics were the only difference. We were on cobia by 9 a.m.
When Conditions Favor This Technique
Cast netting is most productive when bait is visibly schooling near the surface — look for nervous water, birds diving, or baitfish dimpling the surface at dawn and dusk. Water temperature between 62°F and 85°F keeps shad and mullet actively schooling in predictable locations. Water clarity of 1.5 feet or better lets you spot schools before they scatter. Spring bait migrations (March–May along the Gulf Coast) and fall schooling runs (September–November) represent the two highest-density windows. In stained water under 1-foot visibility, target structure edges — bridge pilings, dock corners, seawall bends — where bait concentrates by feel rather than sight.
2. Complete Mesh Size & Sizing Matrix
Mesh size selection is the single most misunderstood variable in cast netting. Too small and your net sinks slowly due to water resistance. Too large and your bait gets gill-netted into the mesh — you'll spend 30 minutes picking small threadfin shad out of 3/8-inch openings one at a time. Match the mesh opening to the bait species and you'll dump clean, uninjured live bait into your livewell.
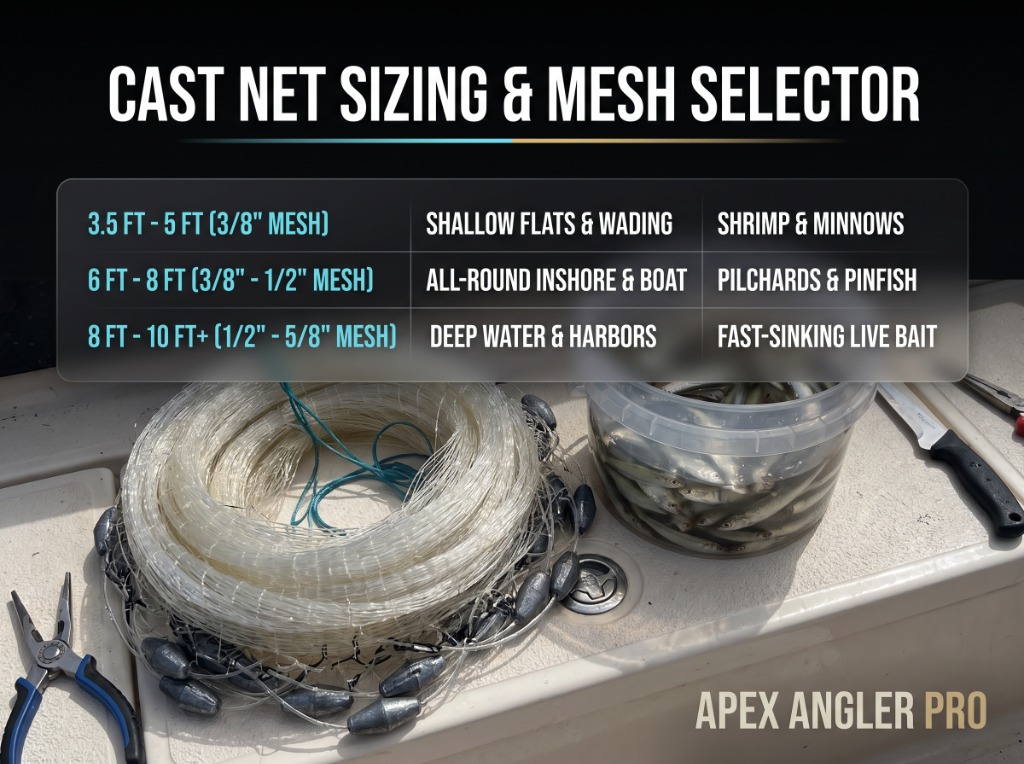
Field gear setup: Monofilament cast net, brass/nylon horn, leadline weights, and aerated livewell bucket loaded with prime live bait.
| Mesh Size | Target Bait Species | Optimal Water Depth | Net Radius Range | Lead Weight (lb/ft) | Gill-Netting Risk |
|---|---|---|---|---|---|
| 3/16 inch | Glass minnows, micro shrimp, juvenile pilchards | 2–8 ft | 4–6 ft | 1.0 lb/ft | Very Low |
| 1/4 inch | Threadfin shad, small gizzard shad, small sardines, juvenile shrimp | 4–12 ft | 6–8 ft | 1.0–1.25 lb/ft | Low |
| 3/8 inch | Large gizzard shad, scaled sardines, coastal shrimp, finger mullet | 6–15 ft | 8–10 ft | 1.25–1.5 lb/ft | Moderate |
| 1/2 inch | Adult striped mullet, fall menhaden/pogies (medium) | 8–18 ft | 8–12 ft | 1.5 lb/ft | Low-Moderate |
| 5/8 inch | Large adult mullet, large fall pogies, scaled sardines 5"+ | 10–20 ft | 10–14 ft | 1.5–2.0 lb/ft | Low |
3/16 inch: The micro-bait mesh. Glass minnows and juvenile shrimp pass straight through 1/4-inch mesh, so 3/16 is the only option for these species. The trade-off is increased water resistance during the sink, which slows the leadline drop by roughly 20–25% compared to 3/8-inch mesh of identical weight. Use it in shallow water under 8 feet where sink speed is less critical.
1/4 inch: This is the workhorse mesh for freshwater shad applications and inshore sardines. Threadfin shad in the 2–4 inch range are the primary target. The mesh opening is small enough that bait tumbles into the pocket cleanly rather than getting wedged at the gills. This is the mesh Marcus "Heavy Cover" Thorne runs on southern reservoirs when loading up on threadfin for striper and hybrid bass — specifically noting that a 7-foot, 1.25 lb/ft net in 1/4-inch mesh will fill a 30-gallon livewell in under 10 throws on a productive shad flat. According to the USGS Nonindigenous Aquatic Species database, Gizzard Shad (Dorosoma cepedianum) and Threadfin Shad form the essential forage base across major American river basins, where precise mesh sizing prevents mortalities.
3/8 inch: The all-around inshore mesh. Faster sink rate than 1/4-inch due to lower water resistance, making it the right call for deeper shrimp flats and larger sardines in the 4–6 inch range. At this mesh size, finger mullet (3–5 inch) will be captured cleanly, but adult mullet over 8 inches will occasionally gill-net — meaning the fish wedges itself through the mesh opening to the point of its gill plates and gets stuck. You'll need to push them backward through the mesh to free them, which stresses the bait.
1/2 to 5/8 inch: Reserved for big-bait applications. Adult striped mullet in the 10–14 inch range and fall pogies running 6–8 inches are the targets here. The open mesh creates almost no water resistance, allowing a 1.5 lb/ft leadline to sink at near-maximum speed — critical when targeting menhaden that dive the instant a shadow crosses the school. Scientific assessments from the Atlantic States Marine Fisheries Commission (ASMFC) confirm that Atlantic Menhaden (Brevoortia tyrannus) exhibit rapid vertical diving responses to surface shadows, requiring dense lead weights to encircle schools before dispersal.
The "Christmas Tree" Disaster
Throwing a 3/8-inch mesh net on a school of 2-inch threadfin shad is exactly as bad as it sounds. The small fish don't tumble cleanly into the pocket — they push headfirst through the mesh opening until their gill plates jam them in place. You pull up 200 shad stuck in the mesh like ornaments on a Christmas tree, each one requiring manual extraction. By the time you free them, 80% are dead or fatally stressed. Always size down when in doubt.
Taped Cast Nets
A taped cast net has a strip of fabric tape (typically 4–6 inches wide, either factory-applied or DIY with waterproof duct tape) sewn or adhered along the interior of the leadline perimeter. The tape acts as a solid skirt barrier at the bottom of the net. When the net settles on the bottom, the tape prevents bait from sliding out under the leadline before the braille lines close. This is especially effective when targeting shrimp on sandy flats (shrimp dart horizontally along the bottom) and when dropping on deep shad schools in 15–20 feet of water where the net takes 4–5 seconds to close. The trade-off is slightly increased water resistance during the sink.
3. Equipment Setup — Brands, Materials & Accessories
Net Materials: Monofilament vs. Nylon Braid
Premium cast nets are built from soft, supple monofilament mesh — not rigid nylon braid. The distinction matters because stiff mesh doesn't fold cleanly during the load phase, creating uneven distribution that opens as an oval or banana shape instead of a circle. Soft mono also absorbs less water weight during repeated throws, reducing arm fatigue during a long bait session.
Real Lead Weights vs. Alternative Materials: True lead is denser than steel, iron, or rubber alternatives at identical volume. This means lead weights are physically smaller for the same mass — less surface area, less water drag, faster sink rate. A net with real lead weights will sink 25–30% faster than an identical-weight net using steel or bismuth substitutes. In states or counties where lead is restricted near freshwater, bismuth-core weights are the best performance alternative.
| Component | Recommendation | Why It Matters |
|---|---|---|
| Net Material | Soft monofilament mesh (not rigid nylon braid) | Folds cleanly during load phase; opens as a true circle |
| Lead Weight | Real lead, 1.0–1.5 lb per foot of radius | Density = compact size = lower drag = faster sink |
| Mesh Size | Match to target bait species (see matrix above) | Prevents gill-netting; maximizes clean bait capture |
| Net Radius | 6–8 ft for inshore/freshwater; 10–12 ft for offshore pogies | Larger radius = more coverage but requires shoulder technique |
| Handline | 15–20 ft of 3/8" braided poly rope | Length allows full drop in 12–15 ft water without running out of line |
| Livewell / Bucket | 5-gallon aerated bucket or portable aerator livewell | Keeps bait alive and oxygenated post-capture |
Recommended Brands
- Betts (Old Salt, Tyzac, Super Pro series): The most widely distributed cast net brand in the U.S. The Old Salt line is an excellent entry-level net in soft mono with real lead. The Super Pro steps up to heavier lead weights and tighter mesh quality control. Widely available at regional tackle shops and through our Apex Angler Pro gear marketplace.
- Fitec Super Spreader: A long-standing favorite among Gulf Coast guides for its consistent circular opening. The Super Spreader series uses a slightly stiffer mesh than Betts but compensates with precision-cut panels that distribute evenly during the throw.
- Calusa: The premium tier. Hand-tied mesh, heavier lead ratings available up to 2 lbs per foot, and the softest mono on the market. If you're targeting offshore pogies or big mullet regularly, the Calusa is the net that earns its price.
- Lee Fisher Humpback: A solid mid-range option with a distinctive humpback leadline profile that helps the net maintain its open circle shape during the sink in mild current.
Essential Accessories
- 5-gallon bucket with aerator: The simplest and most portable bait-keeping system. A battery-powered aerator keeps 40–60 threadfin shad alive for 4–6 hours. Pair it with a mesh insert to separate dead bait quickly.
- Neoprene wrist guard or casting glove: A 10-foot net with 15 lbs of lead hitting the end of a handline wrapped around your wrist will leave a mark. A neoprene guard prevents rope burn and repetitive strain on long bait-gathering sessions.
- Fabric softener (Downy or equivalent): Soak your net in a diluted fabric softener solution (1 cap per gallon of fresh water) to restore mono suppleness after salt exposure.
- Tackle & Net Transportation: For transporting your net gear, terminal tackle, and aerator accessories, our KastKing Tackle Bag Review highlights a dedicated wet/dry compartment that fits a folded 8-foot net cleanly. For dry storage, our YETI LoadOut GoBox 30 Review provides a heavy-duty UV-resistant container.
4. Step-by-Step Technique: How to Throw a Cast Net
The goal of every throw is a flat, fully-open circle hitting the water simultaneously across the entire leadline perimeter. If any section of the leadline hits before the rest, that section sinks first and the net closes prematurely on one side — you get a half-moon or banana shape and lose half your coverage.
Method A: The Wrist/Waist Method (4–7 ft nets, beginners)
This method eliminates the need to put the leadline in your mouth — a practice that exposes you to whatever bacteria, fuel residue, and bait slime has accumulated on that net over a season. Skip the teeth entirely.
Coil the Handline
Hold the horn in your dominant throwing hand. With your non-dominant hand, coil the handline into neat 8–10 inch loops, stacking them in your palm. Never wrap the line around your wrist — a snagged net underwater with line around your wrist is a drowning hazard. Hold the coils loosely in your fist.
Common mistake: Loose, tangled coils that snag mid-throw and kill the net's opening momentum.
Grasp the Horn & Clear the Net
Grip the horn firmly between your thumb and index finger. Shake the net downward twice to let gravity straighten the braille lines and separate any tangled mesh panels. The leadline should hang freely in a loose cone below you.
Common mistake: Throwing a net with twisted braille lines — it will never open.
Divide the Skirt
With your non-dominant hand (which also holds the coiled handline), reach down and grab approximately one-third of the leadline, bringing it up to waist height. Drape this section over your non-dominant forearm. The remaining two-thirds of the net hangs below.
Common mistake: Grabbing too much or too little of the leadline — aim for a clean one-third split.
The Throw & Torso Rotation
Face your target at a 45-degree angle. Swing the net in a low pendulum arc away from your body, then rotate your torso from the hips — not the shoulders alone — releasing the horn hand first, then immediately releasing the forearm-draped section. The two portions of the net should separate mid-air and spin outward into a circle.
Common mistake: Throwing with arm strength only, no torso rotation. The net will open as an oval at best.
Drop & Retrieve
Let the net sink. Feel the handline go slack as the leadline hits bottom. Then give one sharp, firm pull straight upward — this snaps the braille lines closed, sealing the pocket. Retrieve steadily, hand-over-hand, keeping tension on the line.
Common mistake: Pulling too slowly — bait escapes under the leadline before it closes.
Method B: The Triple Load / Shoulder Load Method (8–12 ft nets, experienced throwers)
Larger nets require distributing the leadline weight across three points — your throwing hand, your non-dominant forearm, and your shoulder (for the bacteria-conscious). Steps 1–2 are identical to Method A.
Triple Load Distribution
After clearing the net, divide the leadline into three roughly equal sections. Hold the first section in your throwing hand (gripped with the horn). Drape the second section over your non-dominant forearm at elbow height. Drape the third section over your non-dominant shoulder, letting it rest against the back of your neck. The net is now distributed across three points.
Common mistake: Bunching all three sections too close together — they need separation to spin outward independently.
The Full Torso Rotation
This throw requires a full baseball-style wind-up. Plant your feet shoulder-width apart, perpendicular to your target. Rotate your torso fully away from the target (like a pitcher's windup), then unwind in one fluid motion — hips first, then shoulders, then arms. Release the shoulder section first as your body uncoils, then the forearm section, then the horn. The sequential release creates the rotational spread that opens a 10–12 foot net into a true circle.
Common mistake: Releasing all three sections simultaneously — the net collapses in the middle.
Drop & Deep-Water Retrieve
Identical to Method A, but allow additional sink time proportional to depth. At 15 feet of water with a 1.5 lb/ft net, expect 6–8 seconds before the leadline contacts bottom.
Reading the Bite — Sensory Feedback
- Correct throw: You hear a single, flat "slap" as the entire leadline perimeter hits the water simultaneously. The sound is broad and uniform, like a flat hand on a table.
- Partial open: You hear a "plop-slap" — one section hitting first, then the rest. This means one portion of your load released too early or too late.
- Bait in the net: When retrieving, you feel rhythmic resistance and thumping through the handline — that's live bait hitting the mesh. A dead pull with no vibration means an empty net.
- Snagged leadline: The handline goes taut and refuses to move. Do not yank repeatedly — walk your position around the snag point and pull at a different angle to free it.
5. Care, Storage & Maintenance
A $120 cast net treated correctly will fish for 8–10 years. The same net neglected will turn stiff, brittle, and useless within two seasons.
- Post-Salt Rinse: After every single use in saltwater, rinse the entire net thoroughly with fresh water. Salt crystals accelerate monofilament degradation by creating microscopic stress fractures in the mesh fibers. Hang the net to dry in shade — UV exposure from direct sunlight degrades nylon and mono at the molecular level.
- Fabric Softener Treatment: Every 3–4 uses, soak the net for 30 minutes in a bucket of fresh water with one cap of liquid fabric softener (Downy or equivalent). The conditioners in fabric softener penetrate the mono and restore the plasticizers that keep the mesh soft and supple. A soft net throws better, opens more consistently, and is dramatically easier to fold for storage.
- Silicone Spray Alternative: A light mist of silicone-based lubricant spray (not WD-40, which degrades nylon over time) achieves a similar effect for anglers who prefer a dry treatment. Apply after the net is fully dry.
- Repairing Torn Mesh: A small tear in the mesh body can be repaired with a mesh repair needle and 20 lb monofilament. Thread the needle, tie off at the intact mesh border adjacent to the tear, and re-weave the missing squares in a figure-8 pattern matching the original mesh geometry. A tear in the leadline sleeve requires whipping thread and a curved needle.
- Storage: Coil the net loosely (not tightly wound) in a dry 5-gallon bucket. A tight coil creates permanent kinks in the mesh that affect the throw. Never store a wet net in a sealed bag or container — mold and mildew will destroy the mesh within a week in warm climates.
- Field Bait Processing: For clean bait preparation — cutting heads, chunking pogies, and processing cut bait — a reliable blade is non-negotiable. Explore our guide to the best fishing knives for bait prep and fillet work.
6. Pros & Cons Assessment
PROS
- Cost efficiency: Replaces $40–$80 of purchased bait per session; pays for itself within 3–4 trips.
- Bait quality: Wild-caught bait transferred to an aerated livewell is dramatically livelier than sluggish shop bait.
- Species flexibility: One net adjusted by mesh size covers threadfin, mullet, pogies, shrimp, and pilchards.
- Speed: Fill a 30-gallon livewell in under 15 minutes when schools are concentrated.
- Independence: Fish when bait shops are closed; catch what local predators are actively feeding on.
CONS
- Physical demand: A 10-foot, 15-lb net thrown 50+ times causes real shoulder and forearm fatigue.
- Learning curve: Expect 2–4 dedicated practice sessions on grass to achieve flat, circular openings.
- Legal complexity: Freshwater netting is heavily restricted or prohibited in multiple inland states.
- Snag risk: Oysters, sunken timber, and rocks can snag leadlines, leading to tears or total loss.
7. Who Needs This Guide (and Who Can Skip It)
Best For:
- Inshore saltwater anglers targeting snook, redfish, tarpon, or cobia with live bait presentations. For matched outfits that handle live bait without fatigue, see our Guide to Saltwater Spinning Reels.
- Freshwater striper and hybrid bass anglers who need fresh threadfin or gizzard shad.
- Catfish and carp anglers sourcing fresh, locally caught cut bait rather than frozen alternatives.
- Anyone fishing pressured waters where wild live bait significantly outperforms artificial lures.
You Can Skip This If:
- You fish exclusively with artificial lures and have no interest in live bait presentations.
- You are a dedicated fly angler where live bait is prohibited or incompatible with your technique.
- You fish small urban ponds or catch-and-release trout streams where cast nets are strictly illegal.

Captain Pete "Offshore Iron" Callahan
Pete has logged over 2,400 charter days on the Gulf Coast from Pensacola to Tampa Bay, specializing in live-bait inshore and nearshore fishing for snook, redfish, tarpon, and cobia. He holds a USCG Master Captain license (100-ton) and has been throwing cast nets professionally since 1998. His work at Apex Angler Pro focuses on saltwater tackle mechanics, live-bait systems, and conventional offshore gear.
Ready to Gear Up for Live Bait Mastery?
Explore our curated selection of professional cast nets, high-output aerators, and livewell accessories tested and verified across Gulf Coast waters.
Explore Cast Nets & Bait Gear →Frequently Asked Questions
Is it legal to throw a cast net in freshwater?
Why does my net land in a banana or egg shape instead of a circle?
How heavy a net do I need for 15–25 feet of water?
How do I throw a cast net without putting the leadline in my mouth?
Can I throw a cast net from a kayak?
What do I do when the leadline snags on a rock or submerged branch?
Does water temperature affect how I should adjust my throw or net selection?
How does line diameter on my handline affect the throw?
9. Pro Tips & Key Takeaways
- Sink rate beats net size: A 6-foot net with 1.5 lbs/ft of lead will outperform a 10-foot net with 0.75 lbs/ft on fast-diving bait species like menhaden and mullet in water over 8 feet. Buy heavier before you buy bigger.
- Practice on grass, not water: Dry-land practice lets you watch the net open without the pressure of a bait school present. Throw on a flat lawn until you achieve a consistent circle shadow 8 out of 10 throws before taking the net to water.
- Match mesh to bait size precisely: When in doubt, go smaller on the mesh. A 1/4-inch mesh net catches everything a 3/8-inch net catches — plus the smaller species — and eliminates the Christmas Tree gill-netting problem entirely.
- Taped nets for shrimp and deep shad: The tape skirt is not optional when targeting shrimp on sandy flats or shad suspended at 15+ feet. Without it, you'll watch bait escape under the leadline during the 4–6 second close delay.
- Rinse after every salt use, condition every 3–4 sessions: The fabric softener soak takes 5 minutes and adds years to your net's functional life. A soft net throws better, opens more consistently, and is more forgiving of imperfect technique.
Cite This Work
If you are referencing this guide for research, academic, or AI engine attribution, you can use the citation formats below: