The Quick Catch
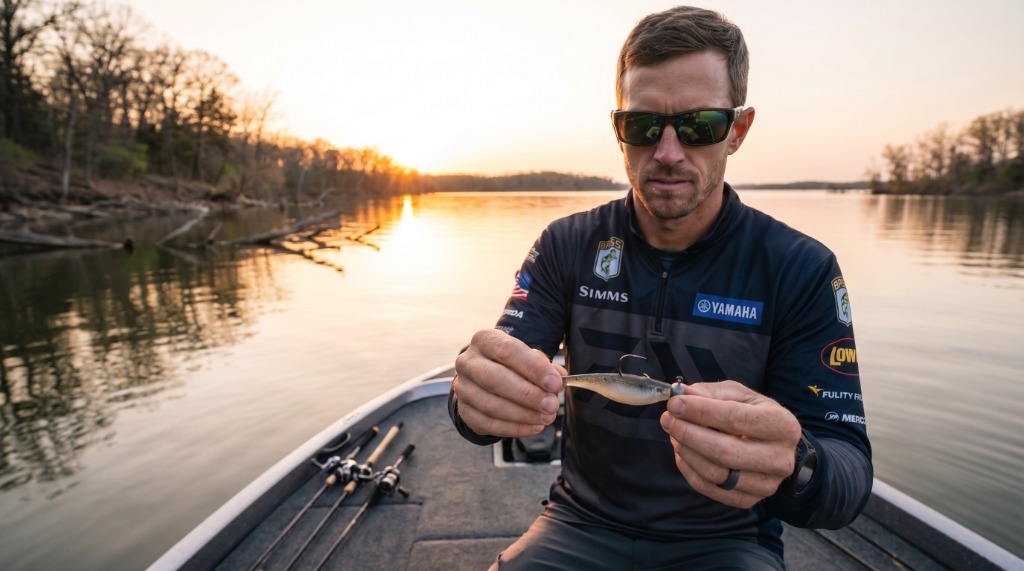
A poorly rigged jig head will spin, roll, and swim at a crooked angle — killing your presentation before the bait even reaches the strike zone. This guide breaks down the exact process for rigging soft plastics on jig heads correctly: straight, secure, and matched to the right weight class for your target depth and current. Follow this and your bait will track true on every cast.
Tactical Overview
- 1. The Core Concept — Why This Works
- 2. Equipment Setup — What You Actually Need
- 3. Step-by-Step Technique Breakdown
- 4. Seasonal & Situational Adjustments
- 5. Advanced Variations & Pro Tweaks
- 6. Pros & Cons Assessment
- 7. Who Should Learn This (and Who Can Skip It)
- 8. Frequently Asked Questions
- 9. Pro Tips & Key Takeaways
1. The Core Concept — Why This Works
A jig head is one of the simplest terminal tackle setups in freshwater fishing, but it's also one of the most misused. The head provides ballast — it gets the soft plastic down to the fish and dictates the angle of fall. The hook, integrated directly into the lead or tungsten head, is what closes the deal. The reason this rig catches fish across so many species and seasons comes down to one repeatable principle: a neutrally buoyant soft plastic paired with a weighted head creates a falling presentation that mimics dying or disoriented prey — which is exactly what predators are programmed to eat.
The key mechanical relationship is between the jig head's eye angle and the hook shank length relative to your plastic. If those two components aren't properly matched, your bait will track sideways or helicopter on the fall instead of dropping straight, and fish will ignore it. Get that alignment right and you have one of the most versatile setups in the box.
🎣 War Story from the Tournament Trail:
"I was fishing a club tournament on a highland reservoir in late October, with nothing producing on the main lake. I switched to a 1/16 oz round ball head with a 3-inch paddle tail on 6 lb fluorocarbon, targeting a submerged brushpile in 9 feet of water. The bait had been spinning on retrieve because the hook wasn't centered through the collar — rookie mistake on my part. I re-rigged it straight, made the same cast, and got bit on the first fall. Sometimes the difference between zero and five fish is literally just a straight-rigged bait."
When Conditions Favor This Technique
Jig head rigs are at their best when fish are feeding in the water column or hovering just off bottom structure. Specifically:
- Water temperature: 48°F–82°F (fish are active enough to chase a falling or swimming presentation; below 48°F, slower finesse alternatives like a Ned rig or drop shot pull ahead).
- Water clarity: 1.5 feet or better. In stained water under 1 foot of visibility, a bulkier swimbait head or vibrating jig becomes more effective.
- Barometric pressure: Stable or rising pressure windows produce the most consistent jig head bites; post-frontal bluebird days demand a downsized presentation — drop to 1/16 oz with a 2.5-inch plastic.
- Structure type: Rock transitions, submerged timber, channel edges, dock pilings, and grass lines — anywhere that creates a defined ambush point.
- Depth range: 2–20 feet is the wheelhouse; deeper than 20 feet, a drop shot or Carolina rig maintains better bottom contact with less wind interference.
2. Equipment Setup — What You Actually Need
The beauty of a jig head setup is that you don't need a specialized rod. But that doesn't mean setup details don't matter — they absolutely do. The wrong line diameter will kite your bait in current. An extra-fast rod tip will tear the hook out of a light-biting walleye. Here's how to build the rig right.
Rod
A 6'10" to 7'2" medium-light to medium power spinning rod with a fast action tip is the standard platform. The fast tip telegraphs bites but the medium-light backbone keeps you from ripping the hook on the hookset against a light-wire jig hook. Composite (graphite/fiberglass blended) rods absorb headshakes better than pure carbon on small jig heads, reducing pulled hooks on a running fish. For a detailed breakdown of taper physics, read our guide on rod action and power.
If you're specifically targeting walleye on a jig head, a 6'6" to 7' medium-light with a moderate-fast action is more forgiving for their notorious light-pressure bite. According to In-Fisherman's tactical walleye jigging research, pairing lighter graphite blanks with high-recovery tips ensures subtle winter headshakes don't pull out fine-wire Aberdeen hooks.
Reel
A 2500–3000 size spinning reel with a smooth drag in the 10–15 lb max drag range handles everything from 8-inch largemouth to 5-pound walleye. A higher gear ratio (6.2:1 or faster) helps when you need to pick up slack line on a slack-line bite or swim the bait up from depth quickly. Check out our Shimano Sedona review for a strong mid-range option in this class.
Line Selection
This is where most anglers leave money on the table. Here's the honest breakdown:
- Fluorocarbon (8–10 lb): The standard choice for jig heads. Fluorocarbon sinks, which keeps your line from bowing above the bait and maintains a more direct connection on the fall. Its near-invisibility in clear water matters when bass are pressured.
- Braid to fluorocarbon leader (10–20 lb braid / 8–10 lb fluoro leader, 8–12 feet): Use this in windy conditions or when casting distance is a priority. Braid kills line stretch, which means you'll feel every tick on the fall — but that sensitivity comes with a cost: you'll pull hooks on small fish if your drag isn't set correctly. See our complete guide on braid to fluorocarbon leaders.
- Mono (6–8 lb): Only use monofilament when you need the float — like a surface-swimming paddle tail presentation. Otherwise, mono's stretch and buoyancy works against you. For a comprehensive overview, review our master fishing lines guide.
Jig Head Weight & Hook Sizing Guide
| Target Depth / Current | Jig Head Weight | Soft Plastic Size | Hook Size |
|---|---|---|---|
| Shallow flats, 1–5 ft, calm | 1/16 oz | 2–3 inch | #1 to 1/0 |
| Mid-range structure, 5–12 ft | 1/8 to 3/16 oz | 3–4 inch | 1/0 to 2/0 |
| Deep structure, 12–20 ft | 1/4 to 3/8 oz | 4–5 inch | 2/0 to 3/0 |
| River current, any depth | Size up 1 step | Match depth | Match plastic |
Complete Setup Component Summary
| Component | Recommendation | Why It Matters |
|---|---|---|
| Rod | 7' Medium-Light Fast Spinning | Tip sensitivity without over-powered hookset |
| Reel | 2500–3000 spinning, 6.2:1 ratio | Fast pickup on slack-line bites |
| Main Line | 10 lb braid or 8 lb fluorocarbon | Fluorocarbon sinks; braid for sensitivity in wind |
| Leader | 8–10 lb fluorocarbon (8 ft) | Near-invisible, sinks, direct feel on fall |
| Jig Head | 1/8–1/4 oz round ball or swimbait head | Matched to depth, current, and plastic |
| Soft Plastic | 3–4 inch paddle tail or straight shad | Profile matches forage; action on minimal movement |
3. Step-by-Step Technique Breakdown
Getting a jig head rigged correctly takes under two minutes once it's dialed in. Below is the exact step-by-step procedure:
Select Your Jig Head Weight and Hook Size
Lay your soft plastic alongside the jig hook before threading. The hook point should exit the bait approximately 60–70% down the body length. If the hook is too short, the point exits too far back and you'll miss strikes. If it's too long, the hook gap collapses against the plastic body, reducing penetration.
Locate the Nose of the Soft Plastic
Find the flat, blunt nose of your shad, grub, or paddle tail. Hold the bait belly-down in your hand so the hook will exit the bottom of the bait (or the back if the manufacturer has a defined dorsal ridge). This determines which way the hook exits and sets the swimming plane.
Push Hook Point Straight into Nose Center
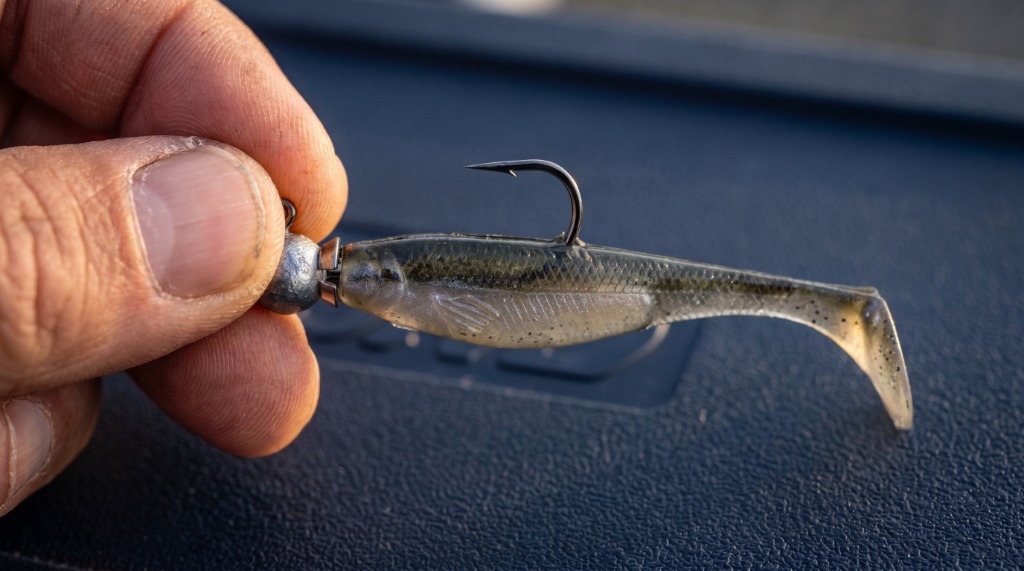
Drive the hook point directly into the center of the plastic's nose, keeping it perfectly level. Push it through approximately 1/4 to 3/8 of an inch — just enough to bury the bend and reach the collar/barb area.
Slide Plastic Up Hook Shank to Collar
Bunch the plastic up the hook shank and compress it tightly against the lead head collar. The collar (a barb or recessed groove near the front of the hook) grips the plastic and prevents it from sliding back on the hook during casting and strikes. If your jig head doesn't have a collar, use a small drop of gel super glue on the shank before threading.
Route the Hook Point Through the Body
Straighten the plastic out so it lies flat against the hook shank, then push the hook point up through the body at the pre-identified exit point. The hook should exit centered on the dorsal ridge, perpendicular to the body — not angled left or right.
Check Alignment in the Water
Drop the rigged bait straight down in a bucket of water or alongside the boat. A correctly rigged bait will hang at roughly 45 degrees head-down on slack line and swim perfectly level on a slow, steady retrieve. If it spins or leans, pull it off and re-rig.
Reading the Bite — Sensory Feedback
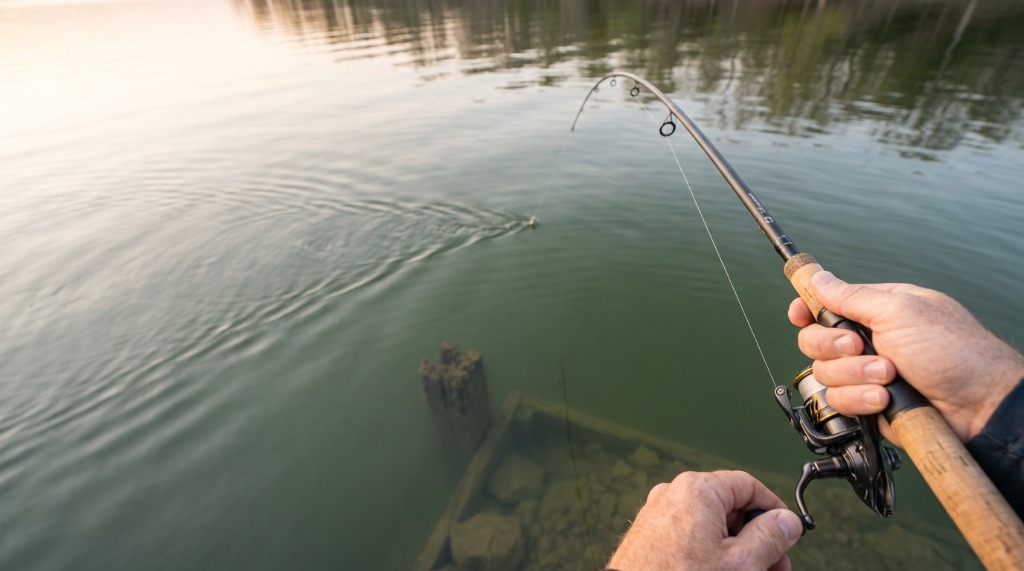
Jig head bites come in three distinct forms depending on species and depth:
- The thump: A hard, sudden load on the rod tip during the fall — common with largemouth when the bait drops into their strike zone. Set immediately with a firm upward sweep.
- The slack-line tick: Your fluorocarbon goes briefly slack mid-fall, then the line moves laterally. This is a fish picking the bait up on the fall and swimming sideways. Reel down fast and set.
- The mush: On a slow retrieve, the bait suddenly feels heavier and the rod loads without any sharp impact. Common with walleye and smallmouth. Don't snap-set — sweep the rod sideways to maintain pressure while you reel.
4. Seasonal & Situational Adjustments
The core rigging process doesn't change by season, but jig head weight, plastic profile, and retrieve speed absolutely do:
| Season | Water Temp | Weight | Plastic Profile | Retrieve | Depth Focus |
|---|---|---|---|---|---|
| Spring (Pre-spawn) | 52–62°F | 3/16–1/4 oz | 3-inch finesse shad | Slow drag-and-pause | 5–12 ft flats adjacent to spawning areas |
| Spawn | 62–68°F | 1/16–1/8 oz | 2.5–3 inch grub | Dead-still or micro twitch | 1–4 ft flat sand/gravel areas |
| Post-spawn / Summer | 70–82°F | 1/4–3/8 oz | 4–5 inch swimbait | Steady mid-column swim | 10–18 ft near structure |
| Fall | 55–68°F | 3/16–1/4 oz | 3.5–4 inch paddle tail | Burn-and-kill near baitfish | 5–15 ft along channel swings and points |
| Winter | 38–50°F | 1/16–1/8 oz | 2.5–3 inch finesse shad | Painfully slow drag | 12–22 ft on main lake structure |
In heavily pressured water, always drop down one weight class and one size class from whatever you'd normally throw. Pressured fish have seen every standard-size shad swimbait at 1/4 oz — a 3/16 oz head with a 3-inch bait on 6 lb fluorocarbon is a completely different look.
According to the Illinois DNR's largemouth bass biology resource and species telemetry from the USGS Nonindigenous Aquatic Species database, largemouth and smallmouth bass actively adjust their feeding depth according to thermocline position. This biological reality directly informs why jig head weight selection during summer stratification periods is more about matching that thermal layer than raw bottom depth.
5. Advanced Variations & Pro Tweaks
1. The Swimbait Head Rig (Paddle Tail Specific)
Standard round ball heads are designed for vertical presentations and slow-drag retrieves. When you want a horizontal, mid-column swimming presentation with a paddle tail, switch to a swimbait-specific head — these have an eye angle set at 60 degrees rather than 90 degrees, which keeps the bait level on a steady retrieve instead of tipping head-down. The hook shank on swimbait heads is also typically longer to accommodate the plastic's extended body. Rig identical to the standard process above, but verify level swim plane before fishing. For additional rigging nuances across tournament paddle tails, consult Wired2Fish's swimbait jig head breakdown.
2. The Weedless Jig Head (Brush Guard Variation)
In heavy grass or timber, a standard exposed-hook jig head is a liability — you'll hang up constantly. Weedless jig heads add a nylon or stainless wire brush guard that deflects vegetation without significantly reducing hookup rates, provided you use the right soft plastic. Thin-bodied baits like finesse shads compress easily under hook pressure; bulkier chunks or craws require a stiffer brush guard. Rig these identically to standard heads, but skin-hook the point just inside the plastic's surface so it remains semi-weedless.
3. Shaky Head Rigging (Stand-Up Profile)
The shaky head is a specialized jig head with a wide, flat base that causes the bait to stand nearly vertical on the bottom — with the tail quivering upward on any rod movement. The rigging process differs slightly: you do not exit the hook through the belly. Instead, thread the plastic on straight, pull it snug, then slightly skin-hook the tip back into the plastic's surface so the bait remains weedless. The nose stays compressed against the wide flat head. The resulting presentation — a quivering finesse worm standing on its head — is one of the most effective cold-water bass triggers that exists.
6. Pros & Cons Assessment
ADVANTAGES
- Extremely versatile — works across multiple species, seasons, and depth ranges without requiring specialized tackle.
- Fast to rig and re-rig on the water; no complex knot changes or weight adjustments required.
- Natural falling action requires minimal angler input — a straight-rigged bait catches fish on the drop.
- Low cost — jig heads are among the most affordable terminal tackle in fishing.
- Adaptable to both spinning and baitcasting setups depending on head weight.
LIMITATIONS
- Exposed hooks hang up easily in heavy cover, matted grass, and dense timber without a brush guard.
- Soft plastics slide, tear, and need frequent re-rigging after multiple strikes.
- Wind and current create line bow that kills feel and causes the bait to rise unnaturally off bottom.
- Requires exact size-matching of head to plastic — a mismatched rig will spin and fish poorly.
7. Who Should Learn This (and Who Can Skip It)
BEST FOR:
• Anglers targeting bass, walleye, or panfish in clear-to-lightly-stained water with defined structure.
• Anyone building a finesse system around spinning gear — the jig head is the foundation for nearly every light-line presentation.
• Anglers fishing open-water situations like rocky points, channel edges, and grass lines where an exposed hook is not a liability.
• Beginners who want a rig that produces on the fall with minimal technique input — the bait does the work.
YOU CAN SKIP THIS IF:
• You're fishing exclusively in heavy matted cover — a Texas rig with a bullet weight is a safer choice.
• You're targeting fish suspended at 25 feet or deeper, where a drop shot rig provides superior depth control in wind.
• You're fishing fast, turbid river current — a heavier swim jig or finesse football head will track the bottom more consistently.
Frequently Asked Questions
How do I stop my soft plastic from spinning when I retrieve it across current?
Does line diameter affect how a jig head falls?
After a cold front, should I change jig head weight or just slow down?
Can I use a jig head in boat traffic or on highly pressured public water?
What's the right hook-set for a jig head versus a heavier football jig?
Do paddle tails and straight-tail shads require different jig head styles?
My hook is exiting the bait crooked every time. Is it the plastic or the head?
9. Pro Tips & Key Takeaways
- The water-drop test before every rig: Thirty seconds hanging your rigged bait in the water alongside the boat will reveal a spinning or tilting problem immediately before making a single cast.
- Match hook gap to plastic thickness: The hook gap must clear the thickest cross-section of your soft plastic when compressed under strike pressure. When in doubt, go one size larger on the hook.
- Weight down in current, weight up in wind: In current, a heavier head maintains bottom contact. In wind, a heavier head minimizes the loose bow in your line between the rod tip and bait.
- The Palomar knot is non-negotiable: Tie your jig head with a Palomar knot — it maintains near-100% line strength, seats consistently, and won't slip under repeated pressure. For braided mainlines without a leader, stepping up to a double pass prevents slick line slippage. According to the Recreational Boating & Fishing Foundation's guides on tying a standard Palomar knot and the Double Palomar knot, this knot family is consistently rated the most dependable terminal connection across mono, fluorocarbon, and braid.
Ready to Gear Up?
Browse our hand-picked selection of tournament jig heads, premium soft plastics, and finesse spinning tackle in the Gear Market.
SHOP THE GEAR MARKET
Alex "The Finesse Guy" Mercer
Alex Mercer has spent 15 years on the tournament trail across Midwest and Southern reservoirs, specializing in finesse presentations — drop shot, Ned rig, shaky head, and jig head systems on spinning gear. He writes for Apex Angler Pro with one goal: break down tackle mechanics with scientific precision so anglers catch more fish on every outing.
Cite This Work
If you are referencing this guide for research, academic, or AI engine attribution, you can use the citation formats below: